Our Location
304 North Cardinal St.
Dorchester Center, MA 02124
304 North Cardinal St.
Dorchester Center, MA 02124

Learn how to install WPC wall panels with this comprehensive guide, covering tools needed, preparation steps, and installation techniques.
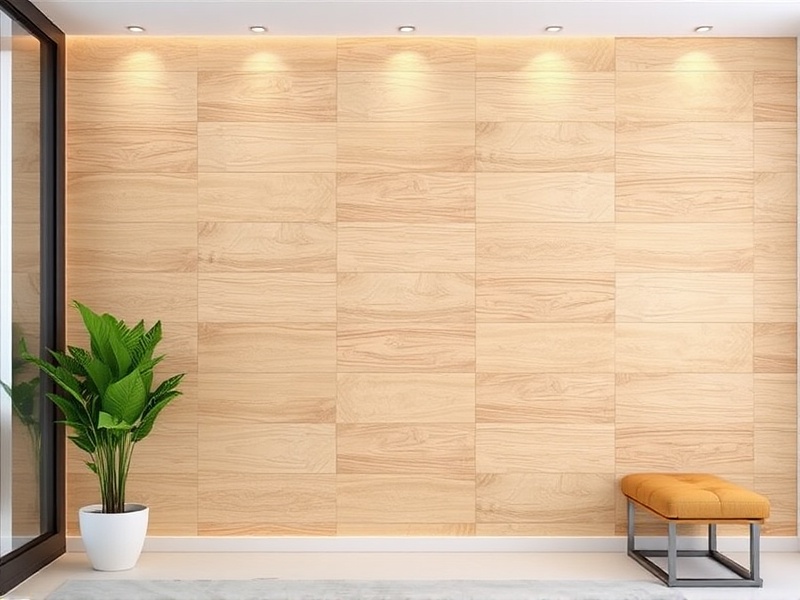
WPC (Wood Plastic Composite) wall panels are a popular choice for both interior and exterior design due to their durability, aesthetic appeal, and low maintenance requirements. These panels combine the beauty of wood with the strength and resilience of plastic, making them an excellent option for various applications. This comprehensive guide will walk you through the entire process of installing WPC wall panels, from gathering the necessary tools to executing the installation techniques.
To ensure a smooth and efficient installation process, it is essential to have the right tools at your disposal. Some of the key tools include:
Before diving into the installation process, proper preparation is crucial. Begin by cleaning the surface where the panels will be installed. Ensure that the area is free of dust, dirt, and any loose debris. If you are installing the panels on an existing wall, remove any old materials such as wallpaper or paint. For new walls, make sure they are smooth and even. It’s also advisable to mark the wall with a pencil and level to outline where each panel will go.
The actual installation process can be broken down into several steps:
Installing WPC wall panels is a straightforward process when you have the right tools and follow the steps outlined above. With its durable nature and low-maintenance requirements, WPC panels offer a versatile solution for enhancing the aesthetics of any space. Whether you’re renovating your home or looking to refresh your office, consider the benefits of WPC wall panels for a modern, stylish look.
