Our Location
304 North Cardinal St.
Dorchester Center, MA 02124
304 North Cardinal St.
Dorchester Center, MA 02124

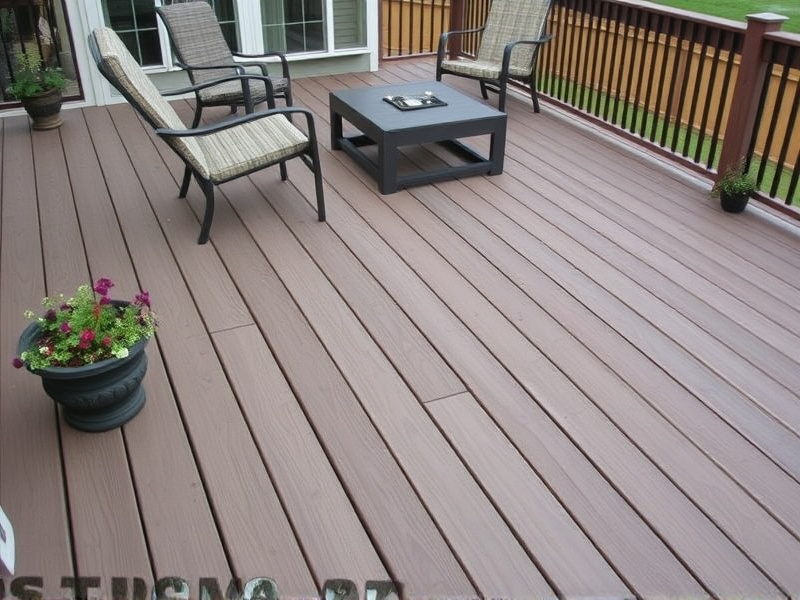
TREX composite decking material is a popular choice for outdoor living spaces due to its durability, low maintenance, and eco-friendly nature. Unlike traditional wood decks that require regular painting and staining, TREX composite decking is made from a combination of recycled plastic and wood fibers, offering a long-lasting and beautiful alternative. This material is resistant to moisture, insects, and fading, making it an ideal choice for homeowners looking for a hassle-free deck.
To ensure a successful installation, you’ll need the following tools: a circular saw, drill, screw gun, tape measure, level, square, and safety gear such as gloves, goggles, and ear protection. Before starting your project, make sure to wear appropriate safety equipment to protect yourself from any potential hazards during the installation process.
The first step in installing TREX composite decking is preparing the site. Clear the area where the deck will be built, ensuring it’s level and free from debris. Use a level and stakes to mark out the perimeter of your deck. This will help you maintain straight lines and even spacing throughout the installation process.
Once the site is prepared, lay down the foundation using pressure-treated lumber or concrete piers depending on your local building codes and preferences. Ensure the foundation is level and secure before proceeding with the next steps. Properly anchoring the deck to the house is crucial for stability and safety.
With the foundation in place, begin assembling the frame. Attach ledger boards to the house using lag screws and washers. Then, install beams and posts at regular intervals to support the deck structure. Make sure all connections are tight and secure to prevent any wobbling or movement in the future.
Start laying the TREX composite deck boards perpendicular to the joists, leaving a small gap between each board for expansion. Use screws specifically designed for composite materials to attach the boards securely. Avoid driving screws too close to the edges of the boards to prevent splitting. Follow the manufacturer’s guidelines for spacing and securing the boards to achieve the best results.
One common pitfall when installing TREX composite decking is improper spacing between boards, which can lead to warping or cracking over time. Always follow the manufacturer’s recommendations for spacing and securing the boards to avoid this issue. Another challenge is uneven surfaces; make sure the substructure is perfectly level before laying the deck boards to ensure a smooth and stable surface.
To achieve a flawless finish, use trim pieces along the edges of the deck to cover any exposed areas. These trim pieces not only enhance the aesthetic appeal but also provide additional protection against moisture and weather elements. Additionally, consider adding a coat of sealant or stain to further protect the deck and improve its appearance.
Installing TREX composite decking requires careful planning, proper tools, and adherence to safety measures. By following these step-by-step instructions and taking precautions against common pitfalls, you can create a beautiful and durable outdoor space that will last for years to come. Remember to consult local building codes and seek professional assistance if needed.
