Our Location
304 North Cardinal St.
Dorchester Center, MA 02124
304 North Cardinal St.
Dorchester Center, MA 02124

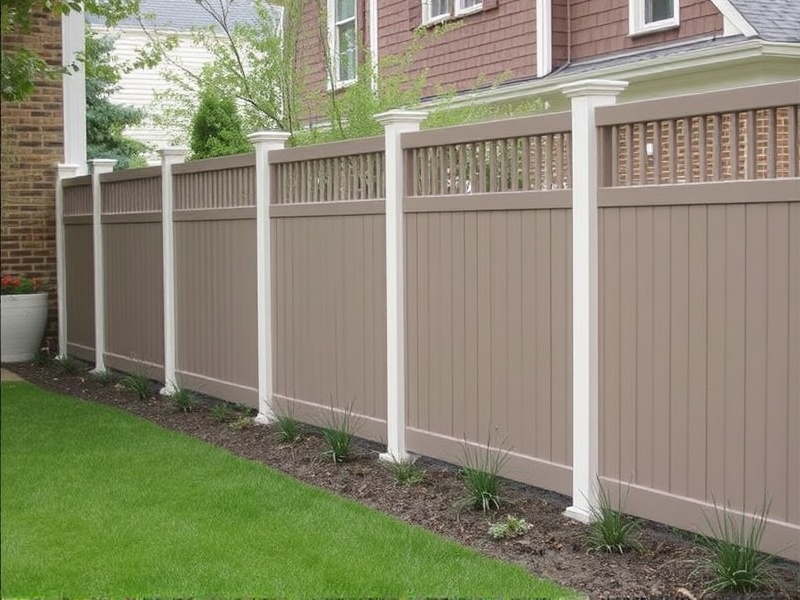
Composite fencing by Veranda offers homeowners a beautiful and durable alternative to traditional wood fencing. Made from a blend of wood fibers and recycled plastics, composite fencing resists rotting, warping, and insect damage, making it an ideal choice for long-term use. However, like any construction project, the success of your composite fencing installation depends heavily on proper planning and execution. This guide will walk you through the process of installing composite fencing by Veranda, offering tips to help you avoid common mistakes.
Before you begin the installation, ensure that the area where the fence will be installed is level and free from debris. This step is crucial as uneven ground can lead to improper alignment of posts and panels, causing instability over time. Use a string line and stakes to mark out the perimeter of your fence. Then, dig holes for the posts at least 1/3 the height of the fence above ground, ensuring they are spaced according to the manufacturer’s recommendations. For added stability, consider adding gravel or crushed stone to the bottom of each hole before setting the posts.
The posts serve as the backbone of your composite fencing system. When setting posts, it’s essential to ensure they are plumb and aligned properly. Use a level to check the vertical alignment of each post. If you’re working with a large section of fence, it might be helpful to set a temporary brace to hold the posts in place while the concrete sets. This prevents them from shifting during the curing process. Remember to allow adequate time for the concrete to fully cure before attaching the panels.
Once the posts are securely in place, it’s time to attach the composite panels. Start by measuring the distance between the posts and cutting the panels to fit snugly. Use appropriate hardware as specified by the manufacturer to secure the panels to the posts. Ensure that all connections are tight and secure to prevent any gaps or wobbling. Pay special attention to the top rail, which should be installed last to provide additional support and stability to the entire structure.
One of the most common mistakes when installing composite fencing is not allowing enough space for expansion. Composite materials expand and contract with changes in temperature. To avoid issues, leave a small gap (about 1/8 inch) between the ends of the panels and the posts. Another frequent error is not using the correct type of screws or fasteners. Always refer to the manufacturer’s guidelines for recommended hardware. Lastly, ensure that all tools and materials are readily accessible before starting the project to avoid unnecessary delays and potential errors.
Installing composite fencing by Veranda is a rewarding project that enhances both the aesthetics and security of your property. By following these steps and tips, you can ensure a successful installation process. Remember, taking the time to prepare the site, set the posts correctly, and install the panels meticulously will pay off in the long run with a fence that looks great and lasts for years.