Our Location
304 North Cardinal St.
Dorchester Center, MA 02124
304 North Cardinal St.
Dorchester Center, MA 02124

Get expert advice on installing composite decking frames. Learn step-by-step instructions and essential tips to ensure a successful project.
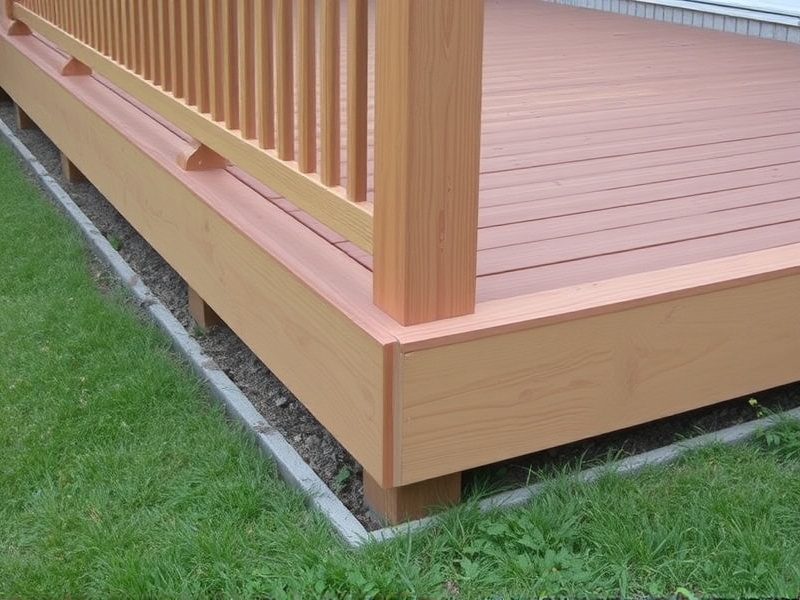
Composite decking frames have become increasingly popular due to their durability, low maintenance, and aesthetic appeal. Unlike traditional wood decks, composite decking materials resist moisture, rot, and insect damage, making them an excellent choice for outdoor spaces. However, installing composite decking frames requires careful planning and execution to achieve a professional finish. This guide will provide you with a comprehensive overview of the installation process, including step-by-step instructions, recommended tools, common pitfalls to avoid, and best practices.
Before beginning your project, ensure that you have all necessary permits and that your site is properly prepared. Clear the area where the deck will be built and level the ground. You may need to add or remove soil to achieve a flat surface. It’s also essential to mark any underground utilities to prevent accidents during excavation. For more information on site preparation, refer to Family Handyman’s guide on how to install a deck.
Start by laying out the perimeter of your deck using stakes and string. Measure and mark the locations for footings and posts. Use a level to ensure that each footing is plumb. Composite deck frames typically use pressure-treated lumber for the support structure because it resists decay better than untreated wood. Ensure that the lumber is straight and free from knots before proceeding.
Install the joists perpendicular to the beams, spacing them according to the manufacturer’s recommendations. Secure them in place with appropriate fasteners, such as screws or hidden fasteners designed for composite materials. Properly spaced and securely attached joists are crucial for supporting the composite decking boards without warping or sagging over time.
Having the right tools can significantly speed up the installation process and help you achieve a professional finish.
