Our Location
304 North Cardinal St.
Dorchester Center, MA 02124
304 North Cardinal St.
Dorchester Center, MA 02124

Discover the detailed process of installing grooved composite decking, including tools needed, preparation steps, and safety tips.
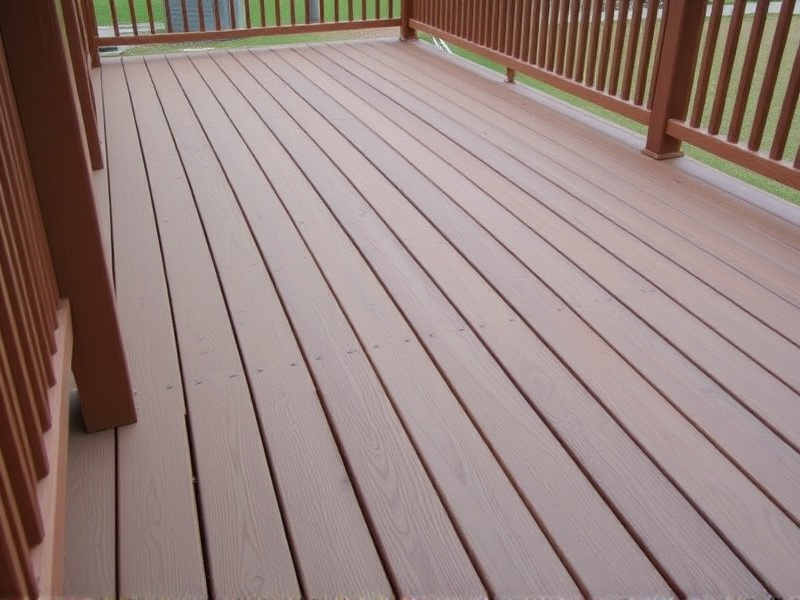
Grooved composite decking is a popular choice for outdoor living spaces due to its durability, low maintenance, and aesthetic appeal. This type of decking material features a groove along its edges, which facilitates the installation of hidden fasteners, ensuring a clean, smooth surface free from visible screws or nails. Understanding the unique properties and advantages of grooved composite decking will help you appreciate why it’s a top pick for many homeowners.
To successfully install grooved composite decking, you’ll need the following tools and materials:
Before starting the installation, ensure the substructure is solid and level. Check for any rot or damage in existing joists and replace as needed. The spacing between joists should be consistent, typically 16 inches on center, but always consult the manufacturer’s specifications for exact requirements. Pre-drill holes into the joists where you plan to place the fasteners to prevent splitting. Additionally, apply a waterproof membrane if your deck will be built over a living space or in areas prone to moisture.
Safety should always be a priority during any construction project. Wear protective gear such as gloves, safety glasses, and ear protection when operating power tools. Ensure all tools are in good working condition before use. Work with a partner when lifting heavy materials, and never work alone at heights. Follow local building codes and obtain any necessary permits before beginning the project.
Begin by laying out the first row of decking boards, aligning them with the outside edge of your deck frame. Use hidden fasteners according to the manufacturer’s instructions, typically inserting them every 16 inches along the joist. For straight runs, start from one end and work your way across, ensuring each board is flush with the previous one. Cut the final board to fit snugly against the opposite wall or railing. Repeat this process for subsequent rows, staggering the joints to enhance structural integrity.
Once all boards are installed, inspect the entire deck for any gaps or uneven areas. Sand down rough spots and fill in any small gaps with appropriate filler. Install railings and stairs as per design specifications. Finally, apply a sealant or stain to protect the wood and enhance its appearance, following the manufacturer’s recommendations for application.
For more detailed information on installing grooved composite decking, refer to the following resources:
