Our Location
304 North Cardinal St.
Dorchester Center, MA 02124
304 North Cardinal St.
Dorchester Center, MA 02124

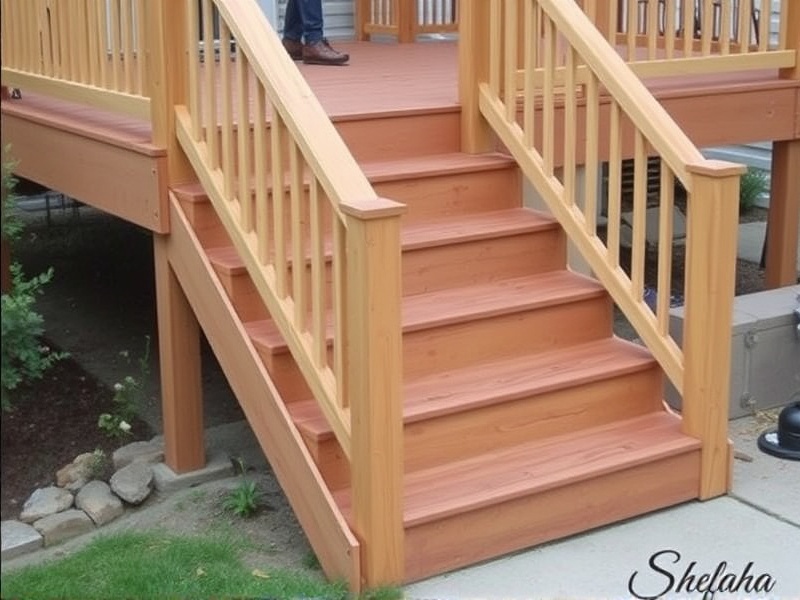
Adding a custom deck stair fascia can significantly enhance the aesthetic appeal of your outdoor living space. A deck stair fascia is a decorative trim that covers the exposed ends of the stair treads and risers, providing a polished look while also protecting the structural components from weather damage. In this article, we will guide you through the process of creating your own custom deck stair fascia with detailed instructions, a list of necessary tools and materials, and tips for achieving a professional finish.
To create a custom deck stair fascia, you will need the following tools and materials:
Before beginning any construction work, measure your deck stairs accurately. Use a measuring tape and square to ensure precise measurements. Sketch out a plan for your fascia design, considering the overall aesthetic of your deck. You can find inspiration for designs online or in home improvement magazines.
Using a circular saw or miter saw, cut the pressure-treated lumber to the required lengths based on your measurements. Ensure each piece fits snugly against the stair treads and risers without gaps.
Attach the fascia boards to the ends of the stair treads and risers using deck screws. Pre-drill holes to prevent splitting, and use wood glue for added stability. Make sure the boards are flush with the front edge of the treads for a clean look.
After installation, sand the fascia boards to smooth any rough edges or splinters. Apply stain or paint as desired to match your deck’s color scheme. Allow sufficient drying time according to the manufacturer’s instructions.
When choosing a design for your deck stair fascia, consider the style of your home and the overall look of your deck. Simple, straight designs are ideal for a modern aesthetic, while more intricate patterns can add a touch of elegance. To ensure a professional finish, pay close attention to detail during measurement and cutting, and use high-quality materials that withstand the elements.
Creating a custom deck stair fascia is a rewarding DIY project that can elevate the appearance of your outdoor space. By following these steps and tips, you can achieve a polished and professional result that enhances both the functionality and aesthetics of your deck. Remember, precision and quality materials are key to a successful outcome.
Family Handyman: Learn more about building decks and adding custom features like stair fascias.