DIY Composite Decking Squares Installation Guide
Introduction
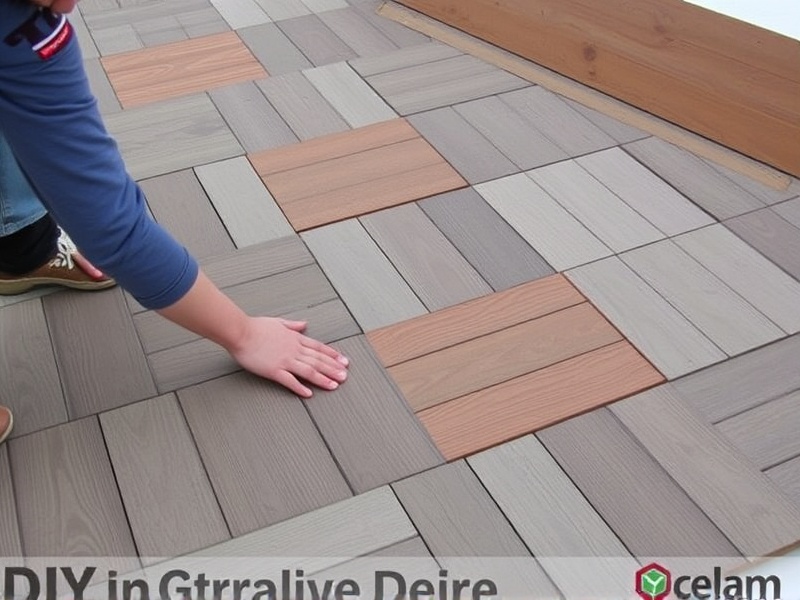
Composite decking squares have become increasingly popular for their durability, low maintenance, and aesthetic appeal. Installing them yourself can save you money and give you the satisfaction of a job well done. This guide will walk you through the process from start to finish, including the necessary tools, preparation steps, and installation techniques. We’ll also cover some troubleshooting tips and advice on maintaining your new deck’s appearance over time.
Necessary Tools and Materials
To successfully install composite decking squares, you’ll need the following tools and materials:
- Composite Decking Squares: Choose a reputable brand that suits your style and budget.
- Screws: Use screws specifically designed for composite decking to avoid splitting the material.
- Deck Joists: Ensure they are spaced according to the manufacturer’s recommendations.
- Measuring Tape: For precise measurements.
- Speed Square: To ensure accurate angles and cuts.
- Jigsaw or Circular Saw: For cutting composite decking squares to size.
- Level: To ensure your deck is perfectly flat.
- Post Hole Digger: For digging holes for deck posts.
- Shovel: For clearing the area where you’ll be installing the deck.
Preparation Steps
Before you begin, it’s crucial to prepare the area where you will be installing the composite decking squares. Clear the site of any debris, vegetation, or obstacles. Mark out the perimeter of the deck using stakes and string. Ensure the ground is level by measuring across the marked area with a level. If necessary, use a shovel to level the ground or add gravel to achieve a solid base.
Installation Techniques
The installation process involves several key steps:
- Lay Out the Decking: Arrange the composite decking squares on the prepared surface to get an idea of how they will fit together. Make sure to leave a small gap between each square to allow for expansion and contraction due to temperature changes.
- Cut the Decking: Use a jigsaw or circular saw to cut the composite decking squares to fit around edges, corners, or obstacles. Always wear protective gear when cutting materials.
- Attach the Decking: Secure the composite decking squares to the joists using the appropriate screws. Follow the manufacturer’s guidelines for screw placement and spacing to ensure stability and prevent damage to the decking material.
- Finishing Touches: Once all the composite decking squares are in place, consider adding trim or railings for a finished look. Seal the deck if desired to protect it from weather elements.
Troubleshooting Tips
Encountering issues during installation is not uncommon. Here are some common problems and solutions:
- Splitting: Use a pilot hole before inserting screws to prevent splitting.
- Uneven Surface: Double-check your leveling work and make adjustments as needed before laying the decking.
- Gap Issues: Adjust the spacing between decking squares during installation to ensure even gaps.
Maintenance Advice
To keep your composite deck looking its best, follow these maintenance tips:
- Cleaning: Regularly clean the deck with mild soap and water to remove dirt and stains.
- Sealing: Apply a sealant every few years to protect the composite material from UV rays and moisture.
- Inspection: Periodically check the deck for loose screws or damaged boards and address these issues promptly.
Conclusion
Installing composite decking squares is a rewarding DIY project that can significantly enhance your outdoor living space. By following this guide, you should be able to complete the installation with confidence. Remember to take your time, follow the manufacturer’s instructions, and enjoy the process!
Reference
How to Install Composite Decking – Family Handyman